Are you looking for a sweet treat to make that is easy and delicious?! Try this gluten free and dairy free peanut butter cups recipe! Bonus: They’re also soy-free!
Note: As an Amazon Affiliate I earn from qualifying purchases made through affiliate links, at no extra cost to you. Read my full disclosure for more information.
Why Gluten Free and Dairy Free Peanut Butter Cups?
I have always loved the name brand peanut butter cups. I remember in junior high I’d get a 4 pack of of peanut butter cups between classes and typically shove them in my mouth whole, one by one, on the way to class because I was so hungry mid-morning! I was a short, skinny little thing and I’m still surprised I was able to eat all of those at once!
Fast forward to now, due to medical reasons I’ve needed to become gluten free, dairy free, and soy free. Yet…I still love peanut butter cups! I’ve tried the one brand I’ve found that has a similar product that meets my dietary restrictions, but they just aren’t the same.
If you can’t have peanut butter, like we recently found my oldest son and I can’t have, you can use Sunbutter or another peanut butter alternative.
Finally, I figured out how to make my own in a rather simple way!
Easy and Delicious Gluten Free and Dairy Free Peanut Butter Cups Recipe
Ingredients
- 1/2 cup Creamy Peanut Butter at Room Temperature Ingredients should be simple, peanuts and maybe salt. Organic is ideal. I prefer Santa Cruz Organic Peanut Butter.
- 2 TBSPs Miyoko's Creamery Cultured Vegan Butter or Earth Balance Buttery Spread, Soy Free
- 1 TBSP Brown Sugar
- 1 tsp Vanilla Extract
- Sprinkle Himalayan Salt We like The Spice Lab Himalayan Salt – Fine
- 1 cup Powdered Sugar Not gonna lie, we use the regular store brand powdered sugar.
- 1 bag Enjoy Life Chocolate Chips divided
Instructions
- Line mini muffin tins with liners if you want to make 24 mini cups. If you'd rather make the larger cups, line 12 regular sized muffin cups.
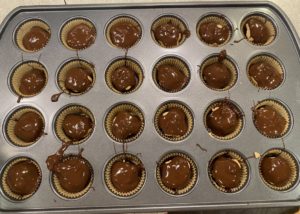
- In a glass measuring cup with spout or other microwave safe bowl, melt half of the chocolate chips in the microwave on the 'melt' setting (you might have one, I just realized we do!) Or microwave for 30 seconds at a time, stirring to check when they're fully melted but not overheated.
- If using a glass measuring cup with a spout you can easily pour some chocolate into the bottom of each muffin cup. Otherwise, you can use a spoon to drizzle chocolate into the bottom of each muffin cup liner. Try to cover the bottom of the liner to give it a good base.
- Put the whole muffin tin in the freezer so the chocolate will solidify while you do the next step.
- Measure out the vegan butter and melt in a glass measuring cup or other microwave-safe bowl.
- In a large bowl, preferably a stand mixer, stir together the peanut butter, melted butter, brown sugar, vanilla, and salt. Stir until the brown sugar dissolves. You can surely mix by hand, I just love using our stand mixer.
- Gradually mix in the powdered sugar until combined.
- Take the muffin tin out of the freezer and place on counter.
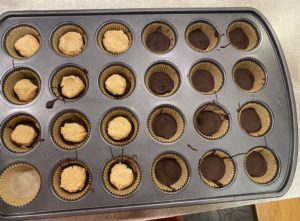
- Scoop some of the prepared mixture into each of the muffin cups, leaving a bit of space around the outside so chocolate will drizzle over it and trap the mixture inside. As you can see in the photo, half of the mini muffin tin has chocolate coating the bottom of the cup and the left side already has the peanut butter mixture over the chocolate.

- As you can see in the pictures, I rolled mine up in a ball and then placed them on top of the chocolate but you could flatten yours or whatever you'd like.
- Next, melt the rest of the chocolate, as you did earlier, which will go over the top of the mixture.
- Once the chocolate is melted, pour the melted chocolate over the top of the peanut butter mixture until covered and the chocolate is gone.

- If you have extra of the peanut butter mixture or chocolate, feel free to combine them and get a preview of the final product 🙂 You have to make sure it tastes good, right?! 🙂
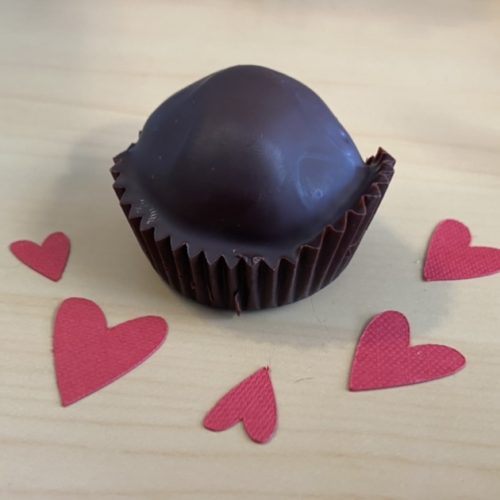
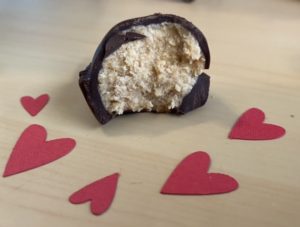
- Once complete, place the entire muffin tin in the fridge for the chocolate to harden for a couple of hours. I tend to just leave mine in the fridge so they aren't too melty when I eat them. Often I'll take one out a few minutes before I want to eat it and then come back to it so it's not quite as solid but really, either way they're so good. If you were setting them out for people to enjoy after a meal, I'd wait to set them out until guests are about to arrive. Don't worry about putting them back in the fridge, they'll surely disappear so you better grab one now! 🙂 (This is a picture after I bit into one.)

Notes
Why Aren’t My Pictures Perfect?
As you’ll notice, the finished product and my photos are NOT perfect. I’m not a food blogger, I just like to share recipes sometimes. Also, I pride myself in showing things ‘The Way it Really Is’ which is exactly why my peanut butter cups didn’t turn out perfect because, why would they? Haha!
No matter how they look, they are delicious. Since I have mini muffin sized cups I am able to put the whole peanut butter cup in my mouth which is delicious…though taking a bite is great too, just usually creates a bit of a mess. Lol
Suggested Materials
Below are my suggested materials for making dairy free peanut butter cups but really, you can use whatever you have on hand. You don’t have to have a stand mixer, you don’t even have to have a hand mixer, you can just use a spoon and your actual hand.
If you don’t have a mini muffin tin, you can use a regular muffin tin. You *might* be able to forgo the muffin tin liners if you don’t have them BUT I have to say, I have not tested that out. You may want to at least grease them with some vegan butter before trying that option, otherwise your delish chocolate peanut butter cups may be stuck in your muffin tin FOREVER!! Ok, not really, but kind of.
Stand Mixer
As I’ve noted in previous recipe posts, I love my stand mixer and am lucky enough to have room to keep it on the counter at all times. When we had a smaller kitchen in our first house, we would store it in the hall closet and it would rarely get used because it’s heavy and it was just a hassle. Now that it’s on the counter, it’s what I use whenever I’m baking, whether it’s really needed or not. I love using this mixer!

Muffin Tins
Muffin tins aren’t fully required for this but I have found them to be helpful. Plus, I love making muffins. I actually have two of the mini muffin size and two of the regular muffin size muffin tins. They nest so well together and my 3 littles gobble up mini muffins like there is no tomorrow.


Parchment Paper Muffin Cups
You could use any type of baking cups / cupcake liners / muffin cups, whatever you want to call them. I prefer the If You Care brand that is unbleached, contains no chlorine, and is gluten free. If you’re asking yourself if other liners actually contain those things, it’s sad but true, they do. It’s amazing how many chemicals and dyes are within everyday products that we just use without even thinking about them. I won’t get into that here though. *steps down from soapbox*
This brand also has parchment paper that we really like.


Himalayan Salt
We switched from iodized table salt to Himalayan Salt many years ago when I started researching more about nutrition and my own health issues, especially when it comes to my thyroid. Turns out iodized salt isn’t ideal… Not only can the excess iodine be harmful to one’s thyroid, Himalayan Salt contains up to 84 minerals and trace elements that are beneficial to our bodies.
We get the Spice Lab Himalayan Salt – fine 5lb bag and then just fill up a shaker. It lasts a LONG time!

Enjoy!!
Have fun with these, they don’t need to be perfect. No matter how they look, they will surely taste delicious!
As a mom of identical twins and a son two years older, I have gained invaluable experience in the realm, and chaos, of parenting. With a Master's Degree and Education Specialist Degree in School Psychology, I spent years as a school psychologist, helping children navigate through their educational and emotional challenges. Now as a stay at home mom and professional blogger, I combine my areas of expertise to help you in your parenting journey.
Hey Nicole! I love this recipe, have you ever used peanut butter with peanuts? Also, do you have to use and spray in the liners?
You commented about Himalayan salt, is it too big that you need to crush it?
Keep up the blogs😃
Hey Jasmin! I haven’t tried it with chunky peanut butter but probably would be delish! I recommend using liners and I haven’t tried it without as I’m worried the peanut butter cups might get stuck without using them. With the liners I use, I don’t need to spray them which is really nice! The Himalayan salt doesn’t need to be crushed as long as you get the fine sized grains as linked above. They do also sell a course grain size that would be great for soft pretzels but not great for this purpose. Hope that helps! Thanks so much for commenting and I’m excited to hear what you think when you make it and if you venture out and try chunky peanut butter instead of creamy! 🙂